Talos Linux was recently added as a supported operating system on Equinix Metal. We’ve had support for Equinix Metal for a while, as we love the people and the product there, and have used them to run our build and CI system going back to when they were Packet. But being an official “click to install” OS makes it even easier to get a Kubernetes cluster running on Equinix Metal.
Let’s see how easy it is to get a full Kubernetes cluster up on bare metal on Equinix, using Talos Linux.
This is kind of a long article, but only because it’s full of pictures and explanations. The whole process consists of:
- Provision your machines on Equinix Metal
- Create a DNS entry for your Kubernetes endpoint (even this is optional if you run a non-HA cluster.)
- Generate the configurations using
talosctl(which is one command line, with two parameters.) - Push the configurations to your servers. Done.
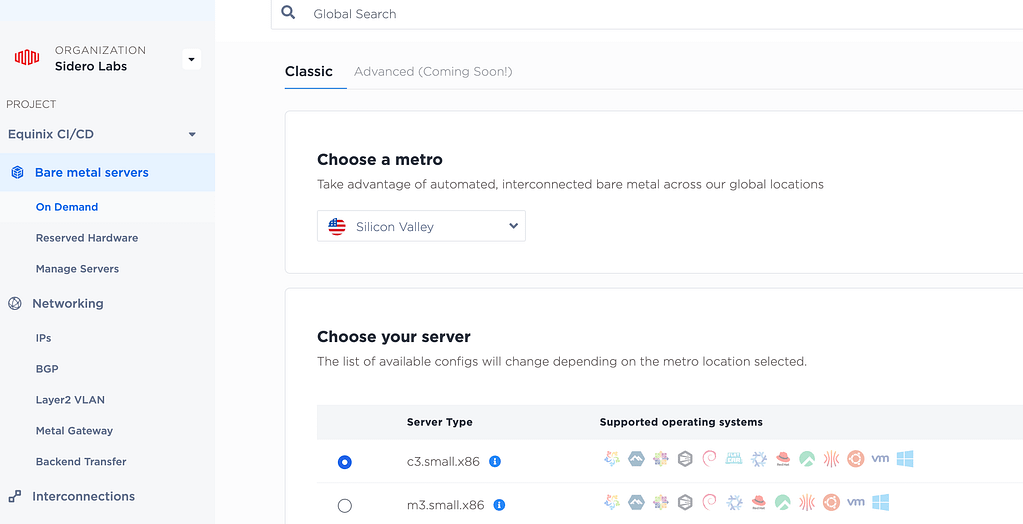
Let’s get going! Log in to your Equinix Metal account, click the New Server button, then select the location and kind of server:
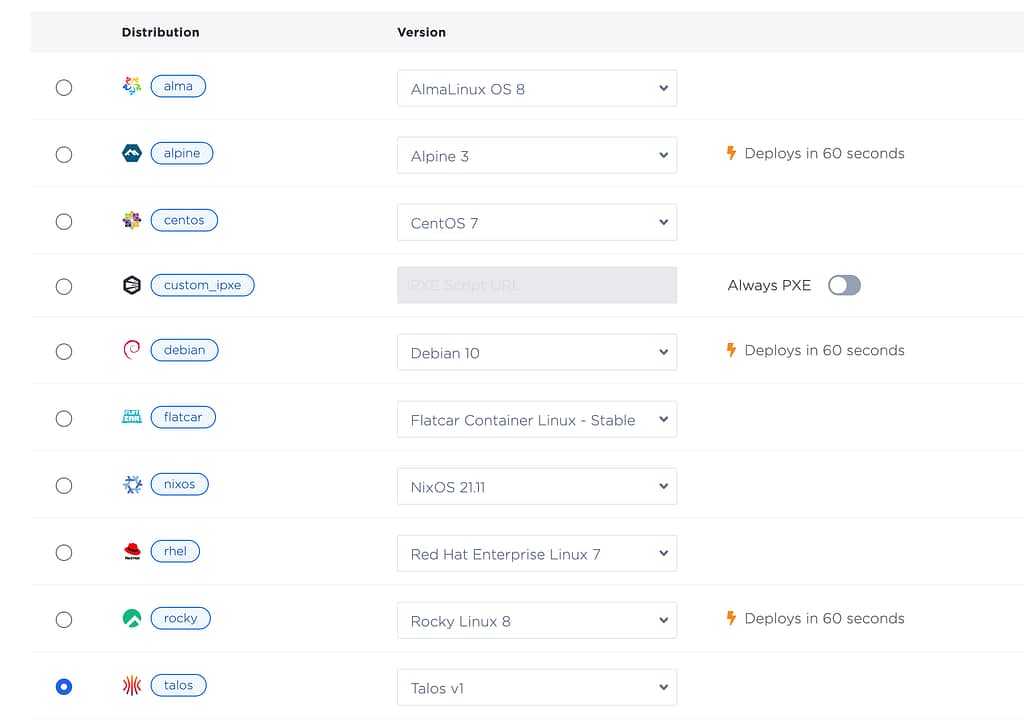
Scroll down to Choose your Operating System, and select Talos Linux:
Then scroll down to the number of servers:

You can of course add different servers of different sizes, and different kinds of servers for workers or control plane nodes – just make sure you select Talos Linux for them all, and make sure you have at least three nodes for your Kubernetes control plane (if this is to be a production cluster that you want to ensure is highly available.)
Also: please use only lowercase for your hostnames. There is currently an issue whereby mixed case hostnames can disagree with the Kubernetes node names.
Click the Deploy Now button, and your servers will roll out.
Kubernetes endpoint
While the servers are deploying, take note of the public IP addresses of the 3 or 5 servers you wish to be your control plane nodes. Create a DNS record with all 3 (or 5) A records to act as the endpoint of the Kubernetes API server. (You can of course use a load balancer or VIP for your Kubernetes endpoint, but DNS is generally quick and easy. And if you are running a test, non-HA cluster, you only need a single control plane node, and can just it’s IP address, and skip this step.)
e.g.
host cluster.mydomain.com cluster.mydomain.com has address 145.40.82.213 cluster.mydomain.com has address 145.40.90.201 cluster.mydomain.com has address 139.178.91.21Create Kubernetes cluster configuration
Now we can create our configuration, and apply it to our nodes.
You need the talosctl command line utility installed. If it is not already installed, download it:
For amd64:
curl -Lo /usr/local/bin/talosctl https://github.com/talos-systems/talos/releases/latest/download/talosctl-$(uname -s | tr "[:upper:]" "[:lower:]")-amd64 chmod +x /usr/local/bin/talosctlOr for arm64 processors:
curl -Lo /usr/local/bin/talosctl https://github.com/talos-systems/talos/releases/latest/download/talosctl-$(uname -s | tr "[:upper:]" "[:lower:]")-arm64 chmod +x /usr/local/bin/talosctlNow we can use talosctl to create the configuration needed for Kubernetes. We need to pass in the name of our cluster (“talos-k8s-em” below) and the DNS name we created for the Kubernetes API endpoint (“cluster.mydomain.com” below).
talosctl gen config talos-k8s-em https://cluster.mydomain.com:6443 generating PKI and tokens created /Users/stevefrancis/Downloads/controlplane.yaml created /Users/stevefrancis/Downloads/worker.yaml created /Users/stevefrancis/Downloads/talosconfigThe three files that are output are all we need.
Push the configuration to the nodes
Now we just have to pass the controlplane.yaml file to the control plane nodes. Because the control plane does not yet have it’s PKI infrastructure set up, it needs the --insecure flag, like this:
talosctl apply-config --insecure --nodes 145.40.82.213 --file ./controlplane.yaml talosctl apply-config --insecure --nodes 145.40.90.201 --file ./controlplane.yaml talosctl apply-config --insecure --nodes 139.178.91.21 --file ./controlplane.yamlYou can now ask one of your control plane nodes it’s view of the cluster, like this:
talosctl --talosconfig ./talosconfig -e 145.40.82.213 -n 145.40.82.213 get members[For those of you not familiar with Talos Linux: the-eor--endpointflag tellstalosctlwhere to send the command to (which has to be a control plane node), while the-nor--nodeflag denotes the system that the command will operate on (which has to be a member of the same cluster). Control plane nodes can proxy requests through to other nodes – useful if workers are not reachable from where the command is being run. The--nodeparameter should pass an IP address from the point of view of the endpoint node (e.g. an internal IP, if that is how it is seen from the endpoint.)]
You should get a response like this:
NODE NAMESPACE TYPE ID VERSION HOSTNAME MACHINE TYPE OS ADDRESSES 145.40.82.213 cluster Member stevecluster1 1 stevecluster1 controlplane Talos (v1.2.3) ["10.67.47.131","139.178.91.21","2604:1380:45e1:5200::3"] 145.40.82.213 cluster Member stevecluster2 1 stevecluster2 controlplane Talos (v1.2.3) ["10.67.47.129","145.40.90.201","2604:1380:45e1:5200::1"] 145.40.82.213 cluster Member stevecluster3 1 stevecluster3 controlplane Talos (v1.2.3) ["10.67.47.133","145.40.82.213","2604:1380:45e1:5200::7"]If you are too quick, you may see a connection refused error while the nodes are reconfiguring themselves. Once you see the get member command return correctly, this doesn’t mean your cluster is up – yet! It’s configured, but has one more step to become a Kubernetes cluster – the bootstrap:
talosctl --talosconfig ./talosconfig -e 145.40.82.213 -n 145.40.82.213 bootstrapThis will bring up Kubernetes and the etcd database. You can watch the progress of your cluster creation with:
talosctl --talosconfig ./talosconfig -e 145.40.82.213 -n 145.40.82.213 healthDownload kubeconfig
Once the health command reports all is well, download your kubeconfig, and you have a cluster!
talosctl --talosconfig ./talosconfig -e 145.40.82.213 -n 145.40.82.213 kubeconfig . kubectl --kubeconfig=./kubeconfig get nodes NAME STATUS ROLES AGE VERSION stevecluster1 Ready control-plane 20m v1.25.1 stevecluster2 Ready control-plane 20m v1.25.1 stevecluster3 Ready control-plane 20m v1.25.1In this example, we created 4 servers in Equinix Metal – we have used 3 for control plane nodes, so we will allocate the other as a worker, by passing in the worker.yaml file:
talosctl apply-config --insecure --nodes 139.178.90.93 --file ./worker.yamlAgain, we can use
talosctl --talosconfig ./talosconfig -e 145.40.82.213 -n 145.40.82.213 healthto watch the reconfiguration of the cluster, then confirm it with get nodes.
kubectl --kubeconfig=./kubeconfig get nodes NAME STATUS ROLES AGE VERSION stevecluster1 Ready control-plane 25m v1.25.1 stevecluster2 Ready control-plane 25m v1.25.1 stevecluster3 Ready control-plane 25m v1.25.1 stevecluster4 Ready <none> 27s v1.25.1You now have a complete, secure, Kubernetes cluster running on Equinix metal. You can add more workers or control plane nodes just as easily, using the same process we just went through.
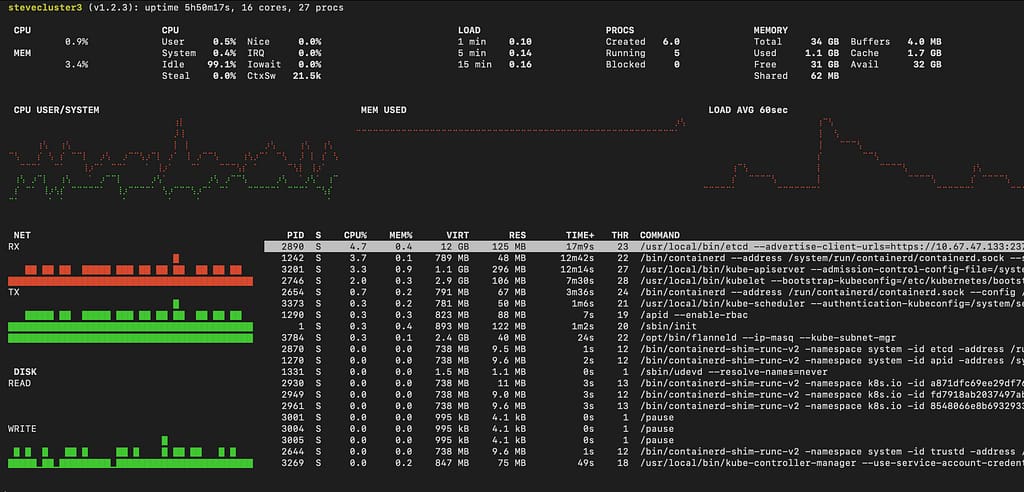
One last note: an oft overlooked Talos command is
talosctl --talosconfig ./talosconfig -e 145.40.82.213 -n 145.40.82.213 dashboardThis allows a quick and easy way to see what is going on with a node – or nodes! You can pass in multiple nodes to -n, and you’ll see their performance all at once.